


 105 / 163

4
Operating Instructions
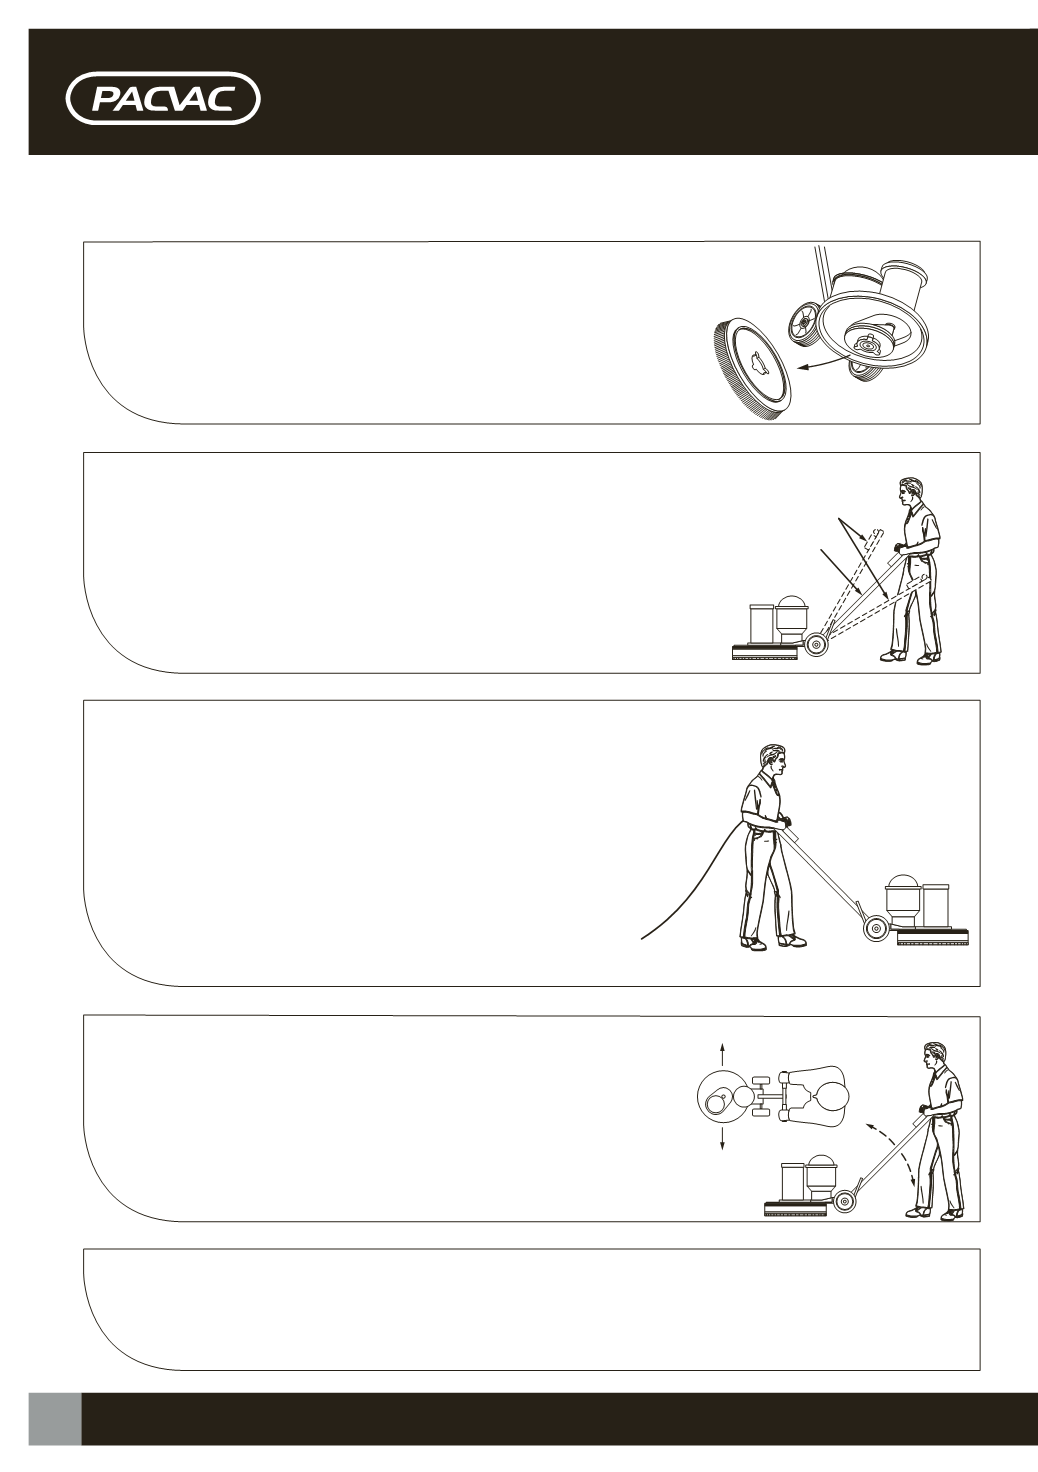
1. Fit brush or drive plate to machine by locking the handle in the
upright position and laying it back on the floor.
2. With the machine in this position, the brush or padholder can
be attached to the quick release drive by turning the locking plate
clockwise.
WRONG
POSITION
RIGHT
POSITION
3. Return the machine to the upright position.
4. Lean the machine forward and lift the wheels with your foot.
The machine should now be resting flat on the floor.
5. Adjust handle to a comfortable position, starting at waist height.
Ideally there should be only a slight bend at your elbows.
6. Ensure that the skirt assembly is sitting evenly on the floor.
7. Unwind the power cord, check for a current test tag. If the machine
is fitted with and RCD, check it has a curent test tag and test the RCD
using it's 'test' button.
8. Grip both handle grips securely.
9. Push the safety switch on the side of the control box at the top of
the handle with your index finger. Whilst held in the depressed
position, squeeze the left hand or right hand lever which will start
the machine. The safety switch may now be released. It will
return automatically to the OFF position and the safety
mechanism will re-set.
TILT
DOWN
TILT
UP
TILT UP
RIGHT
TILT DOWN
LEFT
10. The machine is controlled by balance not strength. Lift the
handle slightly upwards for the machine to move to the right.
Push the handle slightly down for the machine to move to the left.
When the handle is in the central position, the machine stays
stationary.
11. To switchON the vacuummotor simply depress the vacuummotor switch conveniently located on
the under side of the control box at the top of the handle.